Guide to universal design of video and audio
When you communicate information by using video or audio recordings, these must be accessible to everyone, including people who cannot have the sound on or do not want to. This applies irrespective of whether the video or audio recording can be played on a website or whether it is available as a downloadable file. Media content must have captions within 14 days of publication.

Photo: Andrea Piacquadio/Pexels.
About text alternatives for video and audio
Pre-recorded video or audio recordings must have a text option. For audio and video recordings, this can be in the form of a transcription or summary in the vicinity of the recording that depicts the content. Good captions are also sufficient for video.
The text option must:
- Convey the same content as the video/audio clip. You do not need to give an exact description of the content, but you must give enough information to be able to understand the message or purpose.
- Contain information that is important for understanding the audio recording/video. All important sound that is not speech must be depicted. This can be, for example, sound effects, music, laughter and the like. This also applies to important visual information.
- Be presented as accessible text. Make sure that the text format is not "locked", such as an image of text or text that cannot be selected.
- Be visually located near the audio recording/video or be reachable via a link, a button or similar means.
- Mark who is speaking if there is more than one mediator. In the case of a video, it must be marked if it is not clear from the image alone who is speaking in a video, this must appear in the captions. For example, if a presenter goes out of the picture, but continues to speak.
Sounds that are not relevant, such as telephones ringing or someone coughing, do not need to be included.
How to caption video and audio
Captioning videos can seem like a big task, but today we have access to smart tools that can do much of the captioning for us with the help of speech recognition. Below you will find guides on how you can easily generate captions for your video and audio files. Remember to look through the content and correct any errors in the generated captions that could lose the intended meaning of the video.
If you find that the automatic captioning in Panopto has too many errors, you can try using Autotekst. Many people experience better results with the Autotekst solution in their dialect.
Generate captions with Autotekst (UiO)
Autotekst is an auto-transcription service from UiO. Data is stored locally on UiO's servers. The solution can transcribe formats such as MP3, FLAC, WAV, M4A, MP4, MOV, WEBM. The maximum size per file is 4GB. In terms of time, the transcription takes about 20% of the length of the video to process. So if you have a 15-minute video, it takes around three minutes to get a finished text file. You can leave the page while the file is being processed.
Please note that Autotekst should only be used for green or yellow data. Read more about safely storing data here.
- Locate or download the audio or video file.
- Go to https://autotekst.uio.no/en and log in with Feide.
- Upload a file by dragging it over to the designated field via a folder on your PC or press the field to retrieve it from your file system.
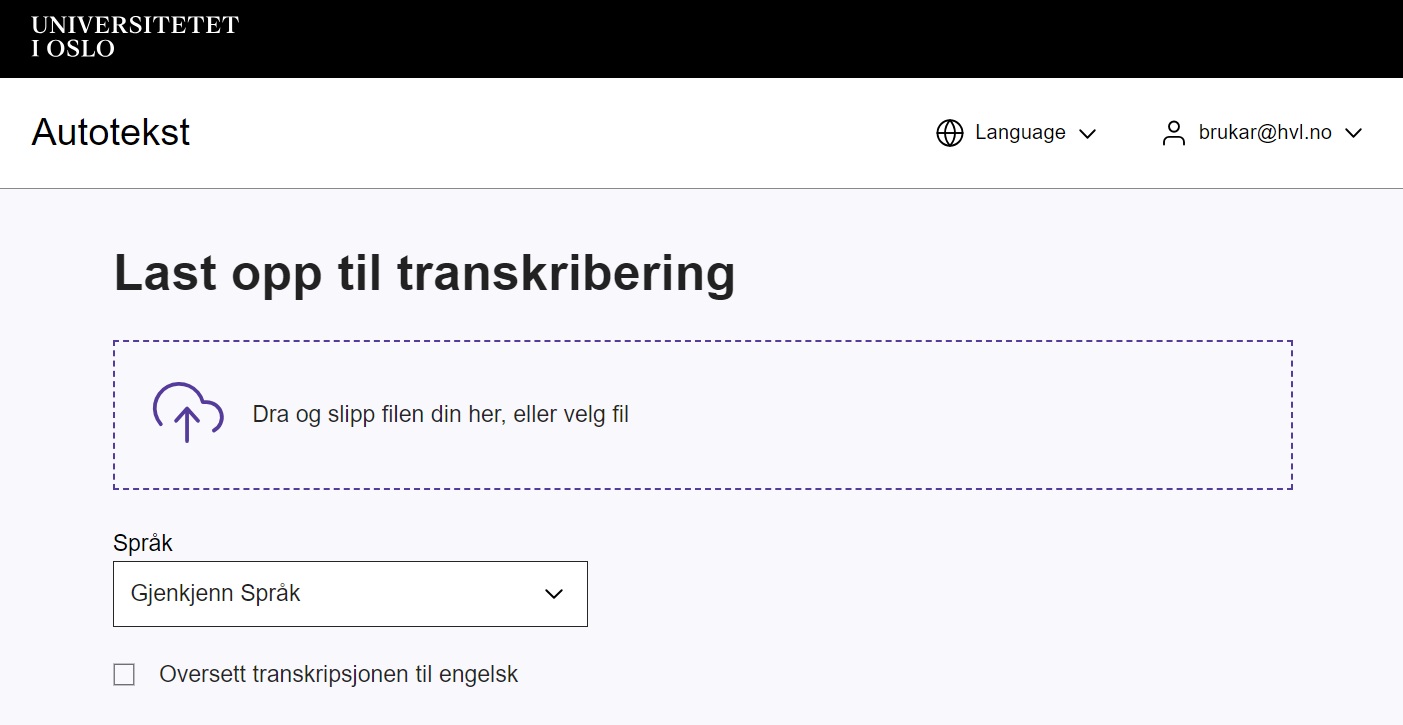
- Select the accurate language in the language field, or let it stay at the "detect language" setting.
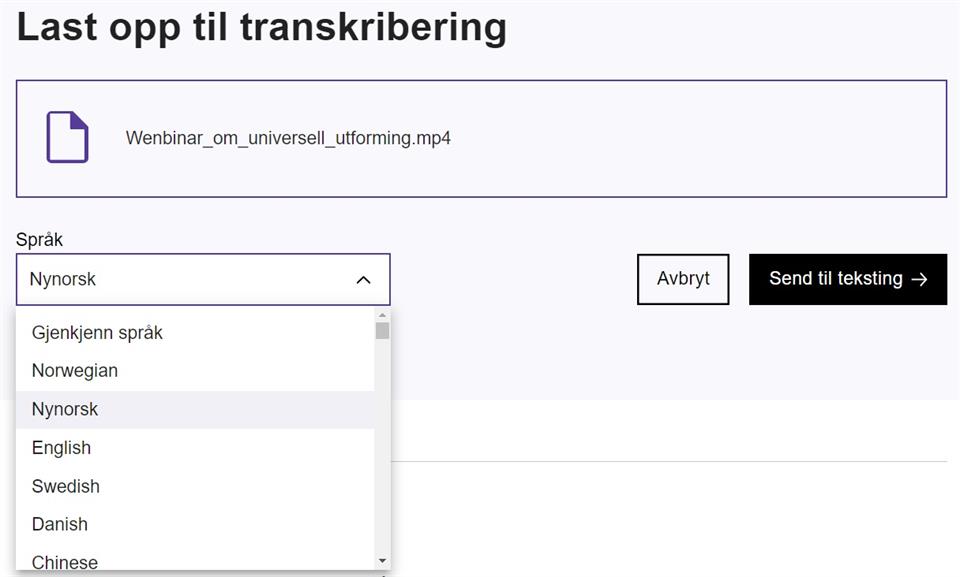
- Click on "Send to texting" to start the transcription.
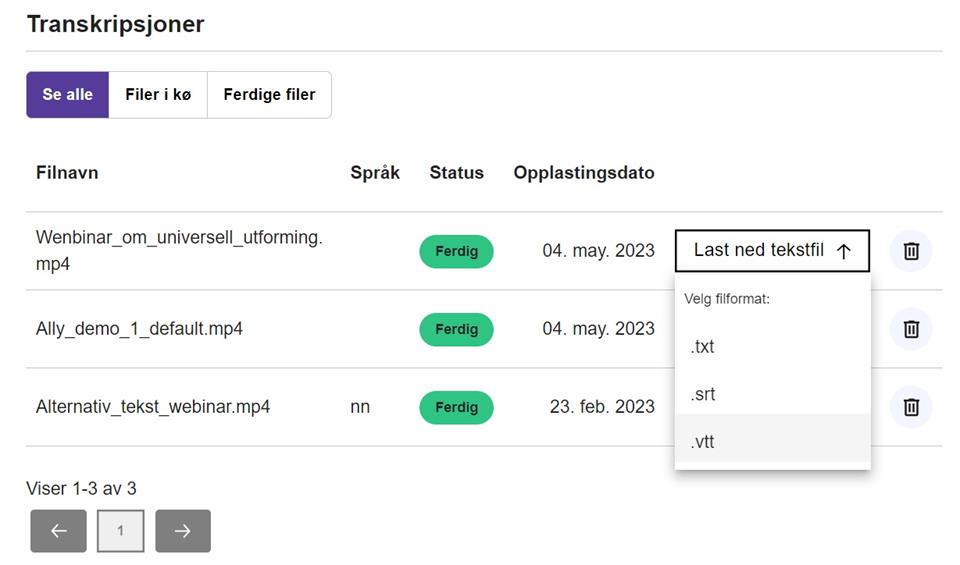
- The transcription and the process will end up in the list of your transcriptions further down the page. When it is finished, you can press "Download textfile". Pick the ".VTT" format.
Contact the UU team at universell@hvl.no if you have any questions.
Add new captions in Panopto
- Find the video you have in Panopto and press the gear
 to get to the settings.
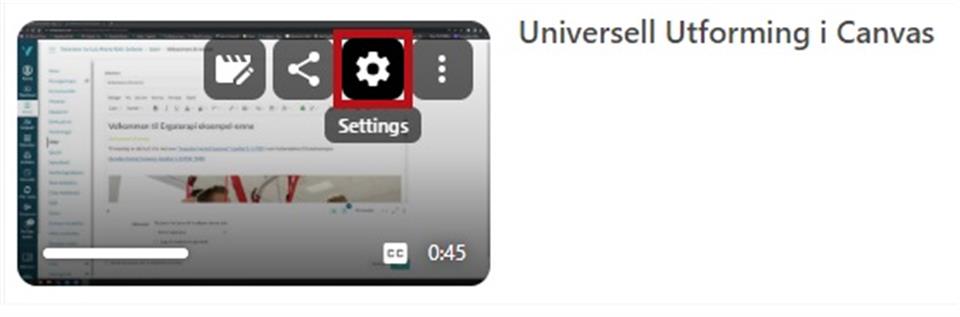
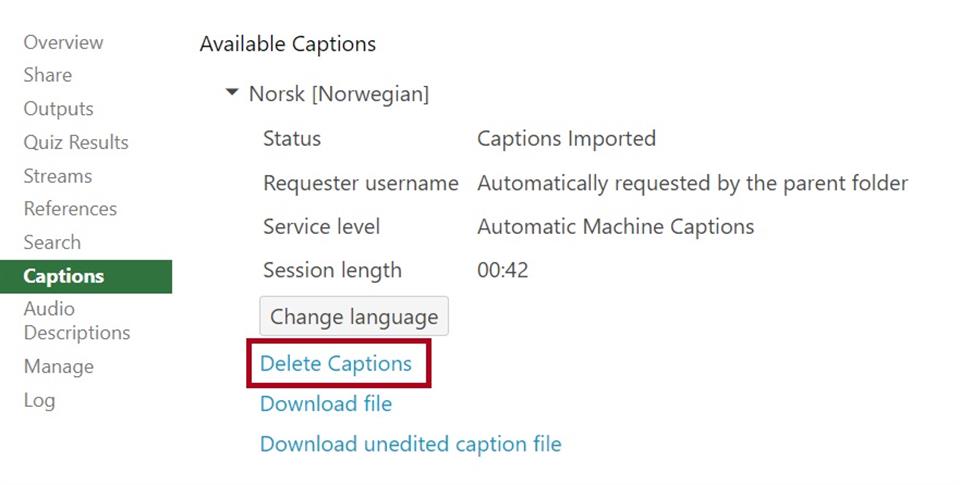
- Go to "Captions". Open "Available captions" and press "Delete captions" to remove auto-generated captions.
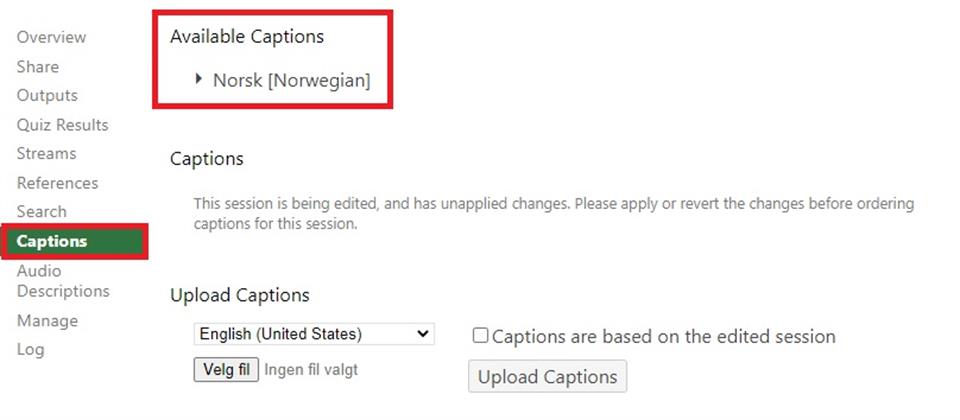
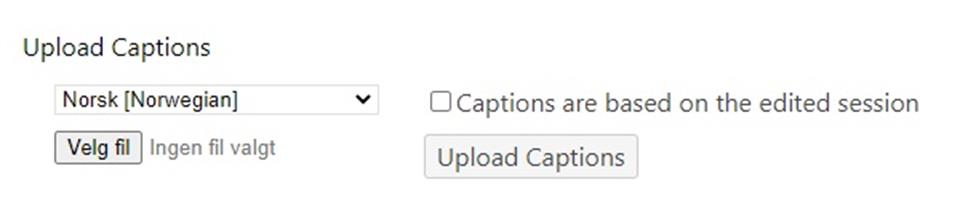
- Under "Upload captions", select the language and the file you want to upload. Then press the button to upload the captions.
- Reload the page (ctrl+R on Windows or cmd+R on Mac) to see if the correct captions are on the video.
Tip! Remember that when someone watches your video without sound, they cannot hear what is being said. It is therefore important to check for major errors in the automatic captions in order not to be misinterpreted. If you discover a mistake, you can easily edit the text directly in Panopto when you are in editing mode. See the next section if you wonder how.
How to edit captions in Panopto
Have you discovered something in the captions that you would like to correct?
- Press the pencil / "edit" to edit the video.

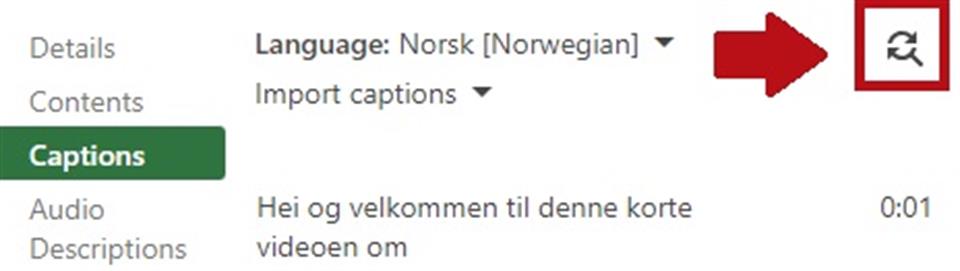
- In the side menu, go to "captions".
- Tap on the sentence you want to edit and edit the text directly in the box.

- Tip! If there are words that are repeatedly misspelled, you can use the "find and replace" tool. Tap the icon with the magnifying glass and circling arrows.
Enter the word you want to correct in the first field, and then the correct word in the second field. Press "replace all" to correct all occurrences of the misspelling.
It may be wise to cut the ending of the word, so that more versions of the word are picked up. Pay attention to words that are not unique and can appear in compound words. - Remember to press "Apply" when you are happy.

How to transcribe and publish a Podcast
There are several programs that generate text versions of audio files/podcasts, e.g. Autotext and Word Online. In the case of podcasts that contain more than one speaker, the transcription must show who is saying what. When using Autotext, it must be entered manually, while Word Online has a useful function that marks who is speaking.
You can access Word Online here. You must create a new document to find the transcribe button.
Watch a video from Magnus Nohr on how to transcribe in Word Online
The finished transcription must be placed near the Podcast, easily visible and accessible.
General recording tips
- The clearer you speak in the recording, the easier it is for the program to detect what is being said, which in turn means less corrections. A good microphone goes a long way. You can borrow a professional microphone for recording at Læringslab.
- Avoid adding music or other sound in the background when someone is speaking.
- Don't be afraid to speak slowly. Panopto gives students the opportunity to adjust the speed up or down.
- Video: Make sure that the person speaking looks in the direction of the camera and that the lighting conditions are good so that it is possible to read lips.
Video without sound
See the uutilsynet's section on video without sound if you plan to produce a video of this type.
Youtube, Vimeo and other external video services
If a video is a compulsory part of the teaching and learning objective in the subject, the video must have captions available or have a text alternative.
Remember to turn captions on if you plan to show a video while teaching, to make it easier for everyone to follow.
More about universal design of audio and video
Do you want to know more about universal design of video and audio? Check the resources from the uuutilsynet and others:
Uutilsynet's questions and answers about video (in norwegian).
Uutilsynet's guide for universal design in video and audio recordings (in norwegian).
NAV's tips for subtitling audio and video (in norwegian).